
Detection automation
Turn a macro into a state machine that watches the screen and reacts.
Video walkthrough on the way
This topic's video is in production. The written guide below covers everything for now.
A normal macro replays the same steps every time. Detection automation turns a macro into a state machine: each step watches the screen, runs actions when it's entered, and moves to another step when a condition matches. You build it on a visual node graph; every step is a node you can drag, connect, and edit.
This page covers the basics. The deeper features each have their own page: Observe & tune, Read text & numbers, Track & follow, Click & press keys, and Reusable skills.
What detection automation does
Most macros are blind to what's on screen; they just replay positions and keystrokes. Detection makes a macro reactive: wait for a button to appear, click it where it lands, branch on a colour, stop a loop when a goal is reached.
Open the detection editor
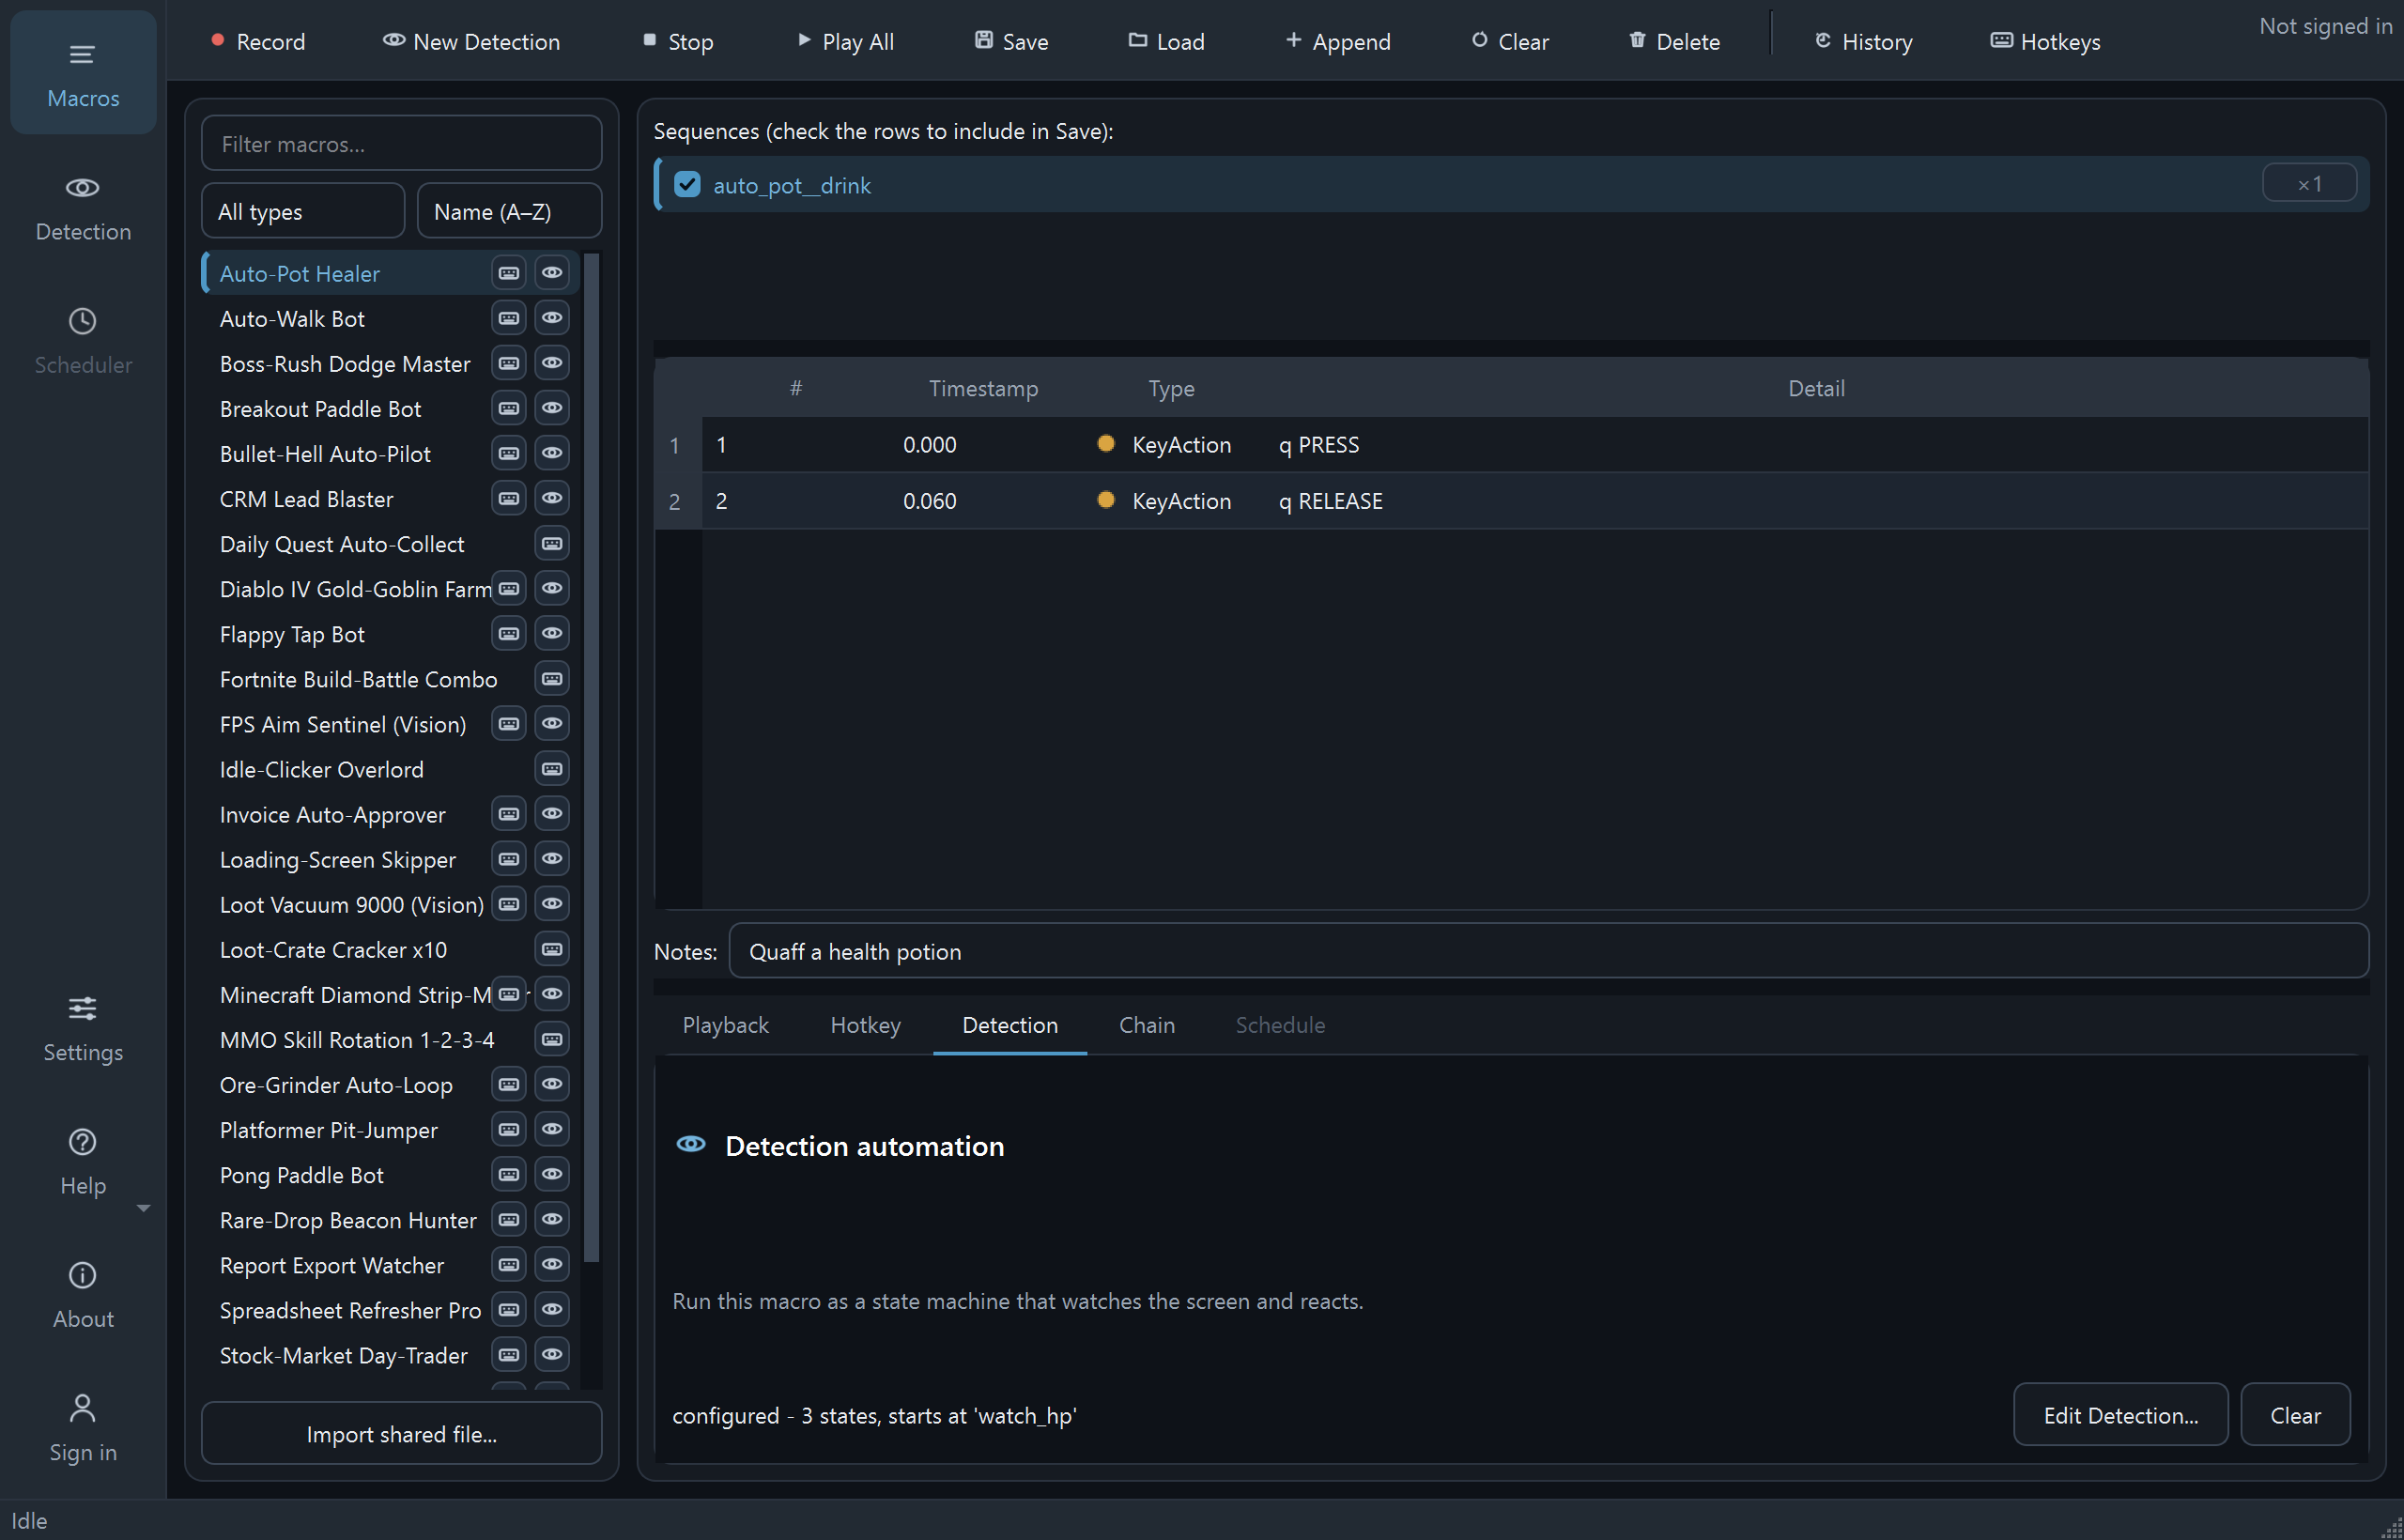
Two ways in. From any macro, open the right-pane Detection tab and click Edit Detection…. While nothing is set the label reads "none - this macro plays normally." Or start fresh: the New Detection button on the top toolbar opens the dedicated Detection view, where a Macro picker and a Monitor picker sit above the same canvas.
Add and configure steps
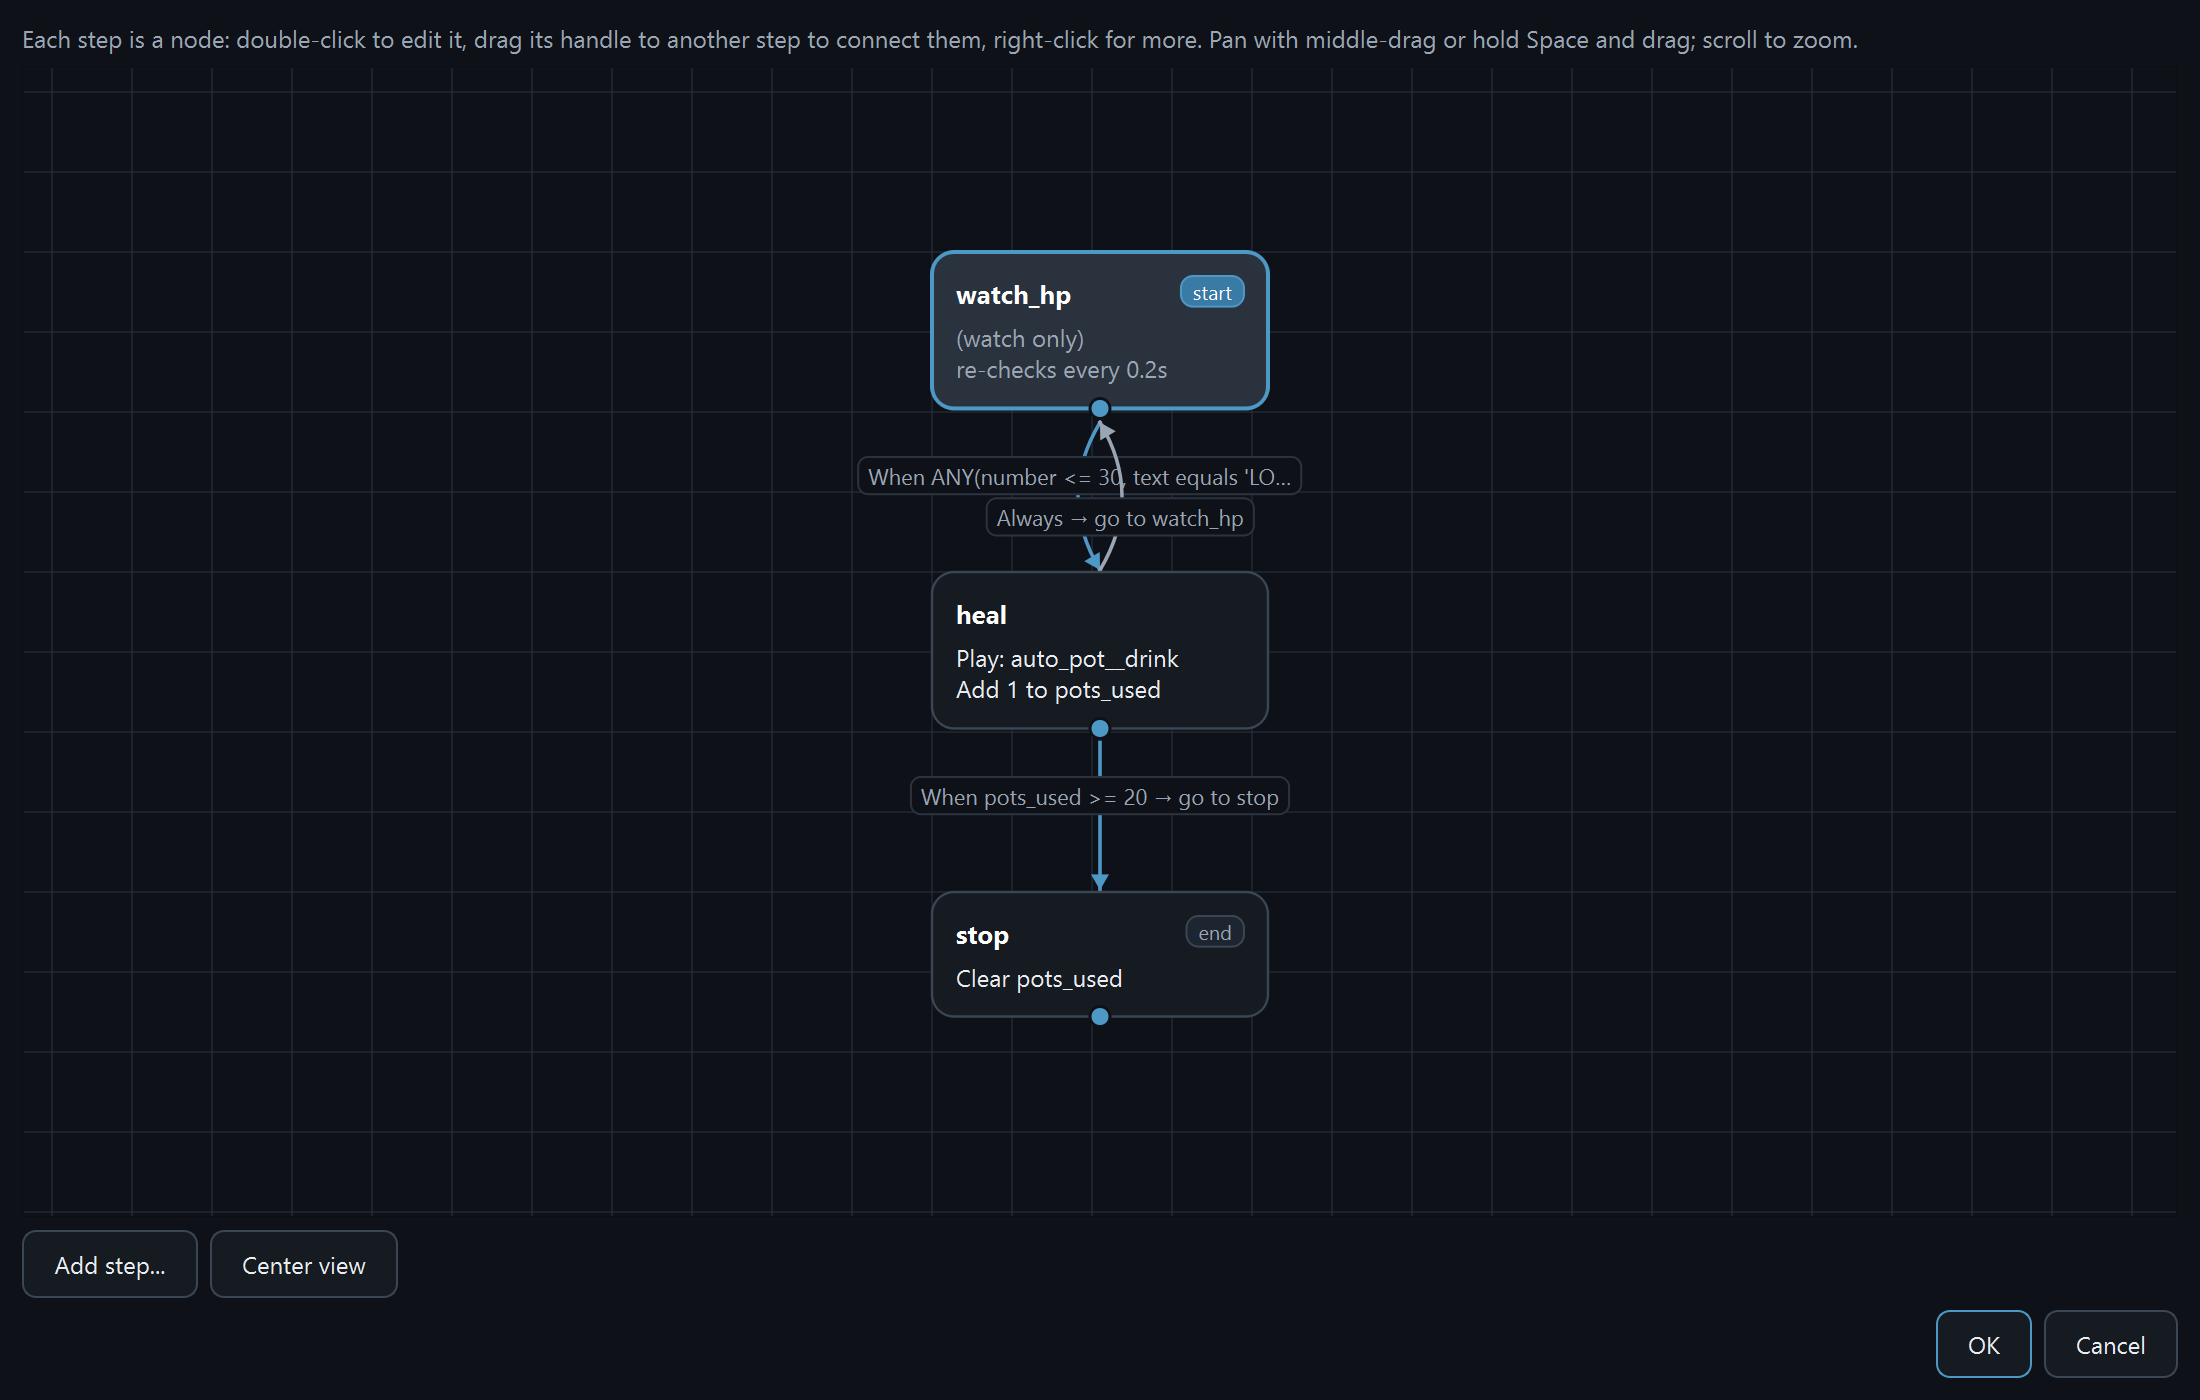
Click Add step… and give it a name. Each step becomes a node on the canvas. Double-click a node to edit it. The hint sums up the controls: "double-click to edit it, drag its handle to another step to connect them, right-click for more."
Under Do — on entry, in order, stack the actions that fire when the step is reached. Add sequence… plays one of the macro's recorded sub-sequences.
Click on what you detect
Add click… is the powerful action: it clicks directly on whatever it detects, wherever it appears, not at fixed coordinates. Steps can also press or hold keys (Pro). Aiming, best-vs-every-match, and the keyboard actuators are covered in Click & press keys.
Wire up transitions
Under Then — go to the next step (first match wins), add the conditions that move the machine forward. A condition watches for an image or a pixel. Combine several with AND / OR / NOT, optionally limit it to a screen region, then point it at a target step. It can match when something is present or when it's absent. You can also add an Always transition, or a timed one ("After 5s → go to…") to retry, wait, or bail out of a loop.
Connect the nodes
Drag a node's handle onto another node to link them. Right-click a node for Edit step…, Set as start, and Remove step; right-click an edge for Edit transition… or Delete transition. Every graph has one start step; mark it with Set as start.
Test before you run
Use Test detection… (or Preview detection… while editing a condition) to check a match against the live screen without playing the whole macro; the preview draws the search region so you can see exactly where it's looking. For a full rehearsal, Try it (dry run) runs the whole draft flow with every action suppressed, see Observe & tune. Smaller capture regions are faster and far more reliable than scanning the full screen.
Save and run
Confirm the editor; back on the macro's Detection tab the label reads "configured - N states, starts at '<name>'." Press Play All to run it and watch the command log for each detection attempt. Clear drops the graph and returns the macro to normal playback.
Multi-monitor: a detection with a screen region figures out the right display on its own, the region says where to look. Only a whole-screen detection on a multi-display setup shows the Monitor picker, for choosing which display to scan.
Stuck on a step?
Detection has the most knobs of any feature, so the Discord is the fastest place to share a setup and get eyes on it.